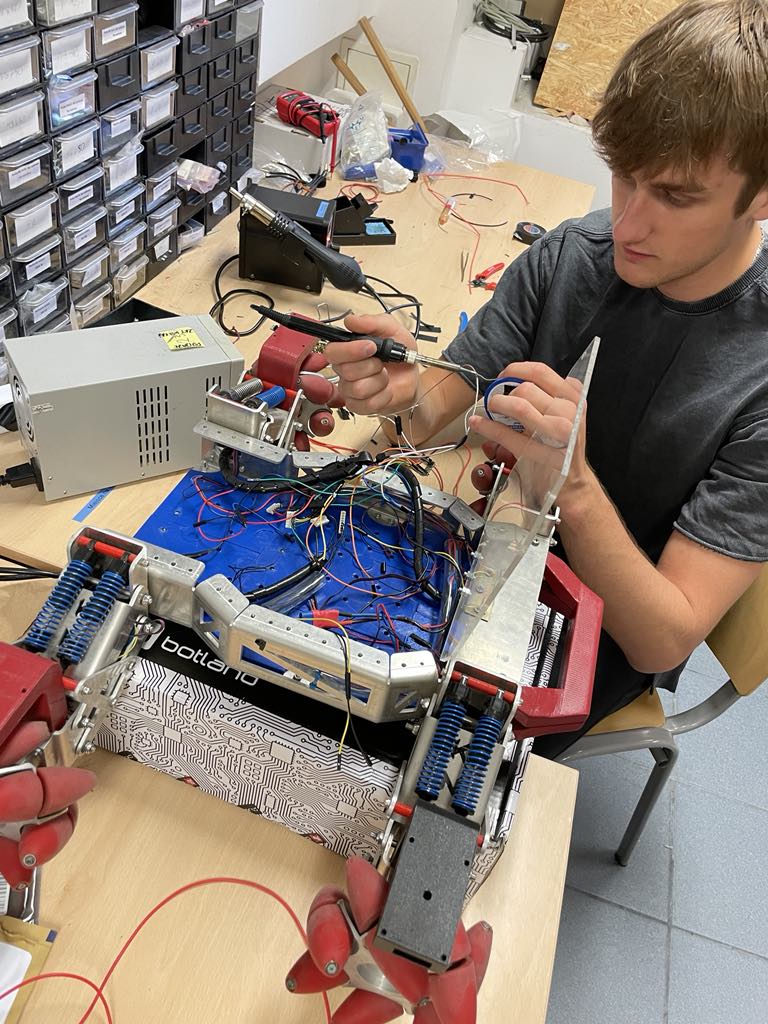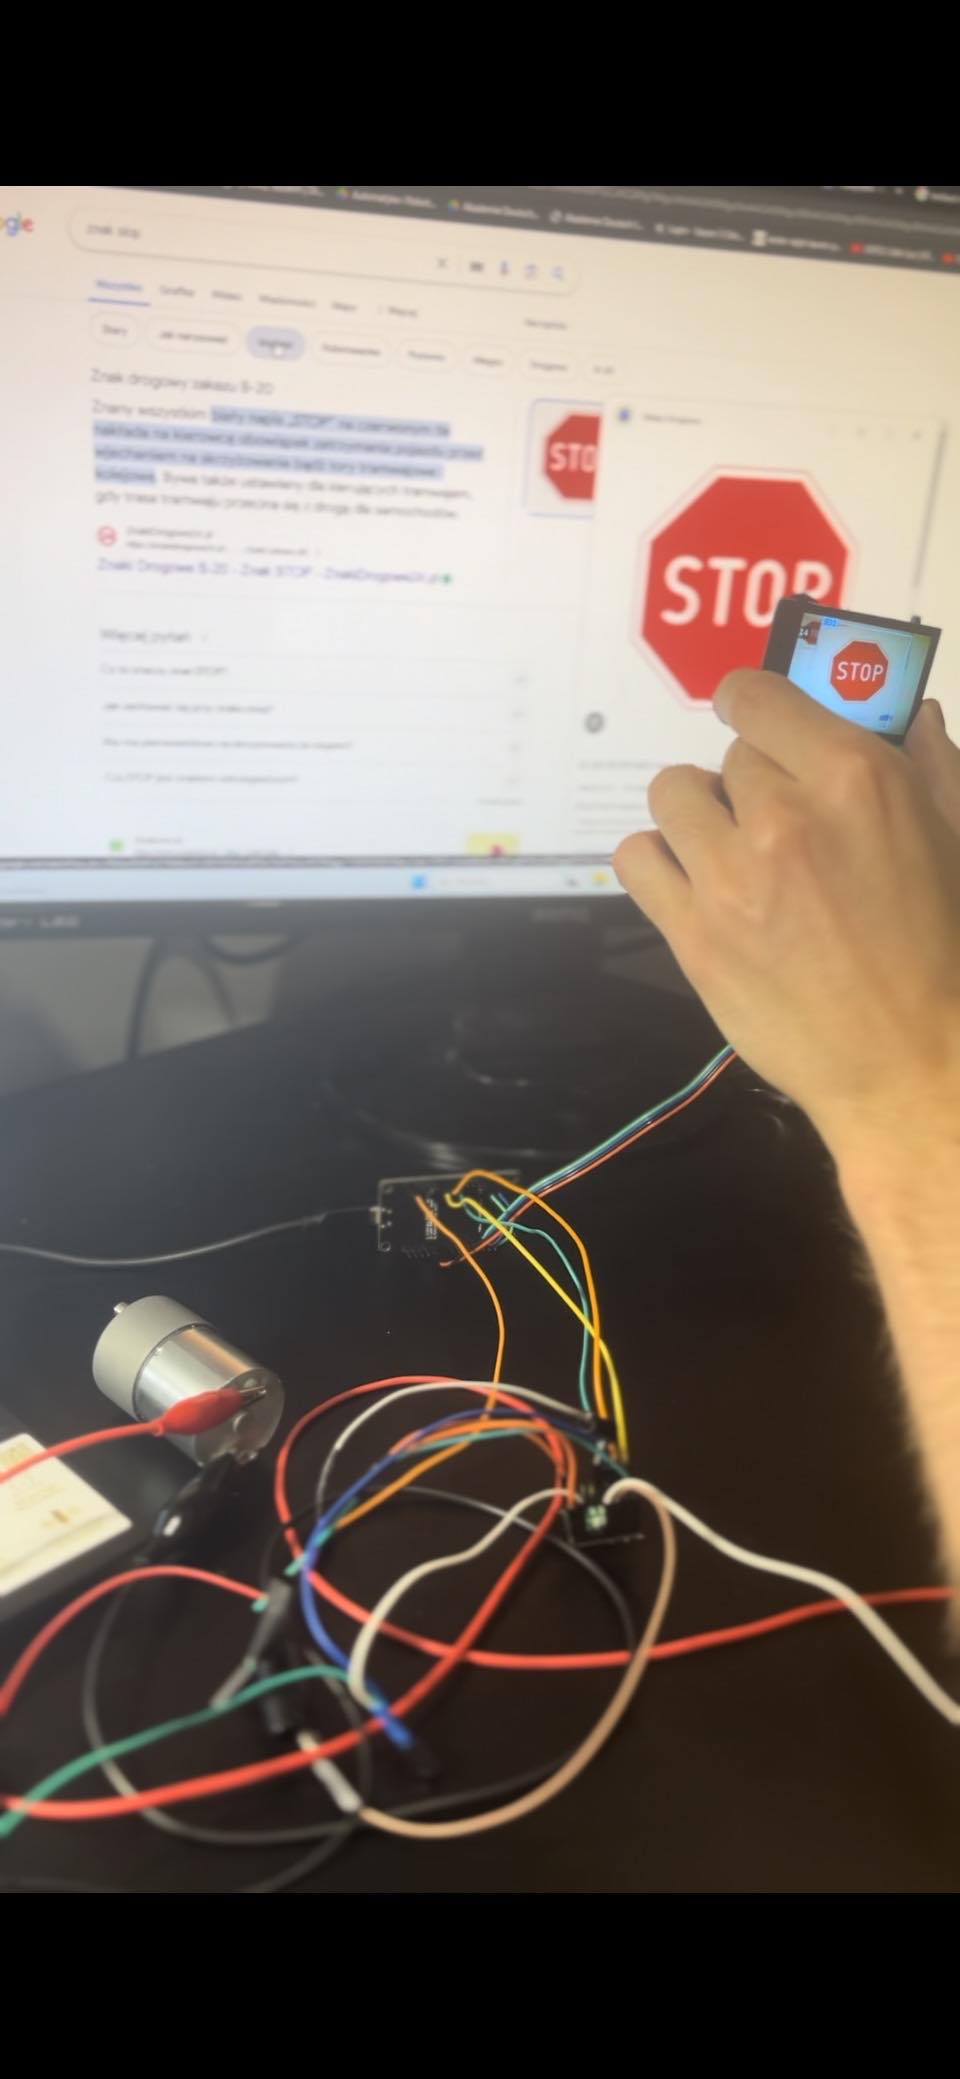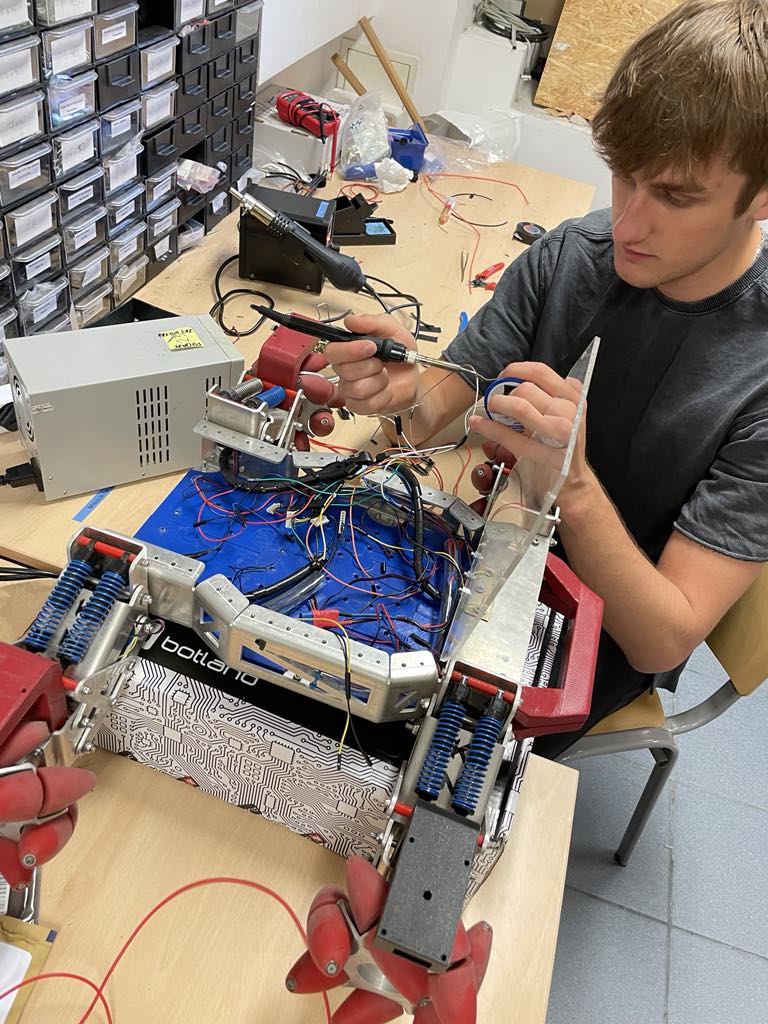
Tu wprowadź krótki opis projektu (max 500 znaków)Naszym celem projektu było skonstruowanie robota który za pomocą rozpoznawania obrazu tj. znaków drogowych ma się poruszać wedle zadanych przez nas instrukcji. Zaczęliśmy więc na robocie Sharky jednak częstość odświeżania była niezadowalająca. Pozyskaliśmy więc lepszy sprzęt użyliśmy robota z koła naukowego w którym jesteśmy członkami zaś elektronikę w większości wykorzystaliśmy z naszych osobistych magazynów, ponieważ oboje jesteśmy pasjonatami robotyki. Jednak nasz robot pod kątem mechanicznym nie działał bez zarzutów, a to dlatego, że używaliśmy 2 silników na 4 dostępne, ze względu na to, że nasz mostek H się spalił. Jednak w przyszłości nie wykluczamy rozwoju projektu i budowy większej ilości funkcjonalności!
- Płytka ESP8266
- Kamera huskylens
- 4 silniki
- Mostek H
- Kabelki
- Biblioteki:
- Husky lens
- Wire
- ESP8266
- FS
Funkcje sterujące robotem
Sterowanie robotem odbywa się za pomocą podstawowych funkcji w przód, stop i skręt w lewo(nie użyliśmy skrętu w prawo, ponieważ nasz model nie był odporny na rozróżnianie znaku nakazu skrętu w lewo i w prawo). Inicjalizacja funkcji była prosta obraz odczytywany na kamerze był analizowany za pomocą algorytmu rozpoznawania obiektów (wgraliśmy na naszą kamerę 3 obiekty), gdy obraz został rozpoznany, wysyłał za pomocą protokołu I2C proste znaki liczbowe od 1 do 3 za pomocą algorytmu odczytywania danych z kamery nasz program podejmował decyzję na temat jazdy. Tutaj nasz sprzęt też nie chciał na początku z nami współpracować, ponieważ komunikacja UART nie działała mimo, że wartość Baud Rate była zsynchronizowana.
Rozpoznawanie obrazów
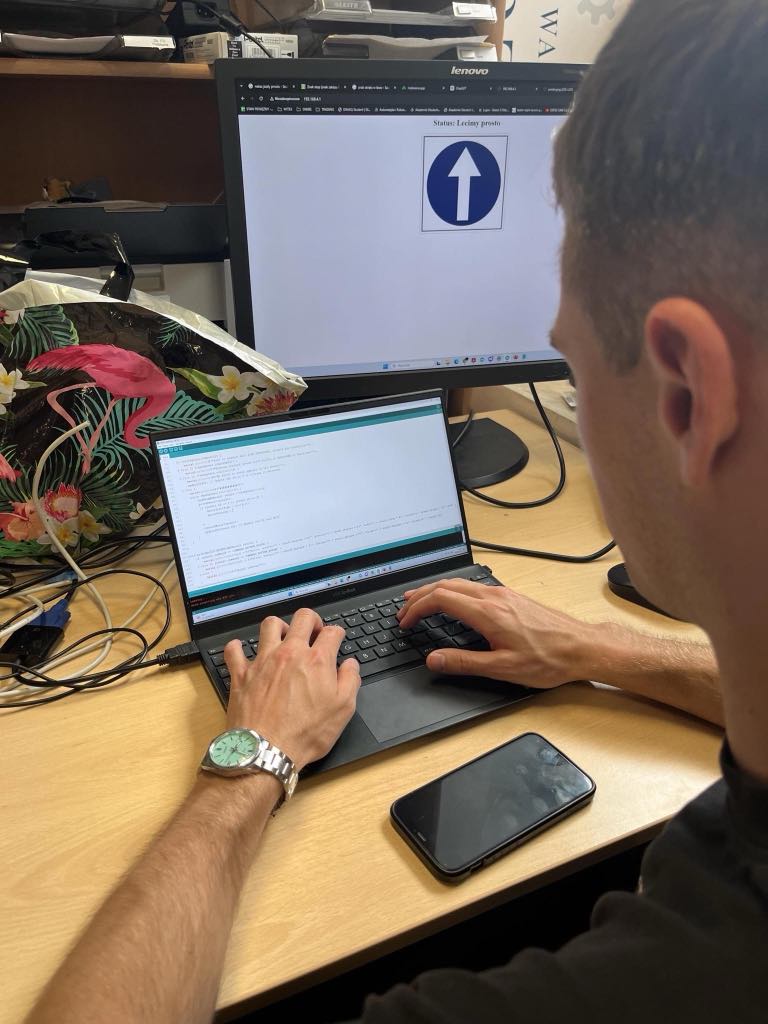
Kamera ma funkcję zapisywania wcześniej rozpoznanych obiektów do swojej wew. Pamięci - skorzystaliśmy z tego. Wykonaliśmy zdjęcia za pomocą naszej kamery interesujących nas znaków, które miały być wykrywane przez system. Zdjęcia te były zapisywane jako ID1, ID2, itd. W kodzie odpowiednio skonfigurowaliśmy system, aby w momencie wykrycia np. ID1, lewy i prawy silnik zaczynały pracować. Chcieliśmy również umożliwić użytkownikom podgląd na żywo, który znak jest w danej chwili interpretowany. W tym celu dodaliśmy funkcję wyświetlania obrazów na stronie 192.168.4.1, dostępnej po połączeniu się z siecią Wi-Fi.
Jak dodać wyświetlanie obrazów na stronie?
- Pobierz bibliotekę FS.
- Utwórz folder o nazwie "data" w katalogu, w którym znajduje się plik Arduino, i umieść w nim zdjęcia.
- Wgraj zdjęcia za pomocą narzędzia: Narzędzia → ESP8266 Sketch Data Upload.
Po odpowiednim zaprogramowaniu system będzie reagował na wykrycie konkretnych znaków. Poniżej znajduje się przykład kodu:
// Obsługa URL /prosto.png
void handleProstoImage() {
File file = SPIFFS.open("/prosto.png", "r");
if (file) {
server.streamFile(file, "image/png");
file.close();
} else {
server.send(404, "text/plain", "File not found");
}
}
Powyższy kod służy do wczytywania zdjęć, natomiast do wyświetlania zdjęć na stronie służy funkcja void handleRoot()
Aktywacja modułu wifi:
// WiFi credentials for the AP
const char* ssid = "SMARTBABY";
const char* password = "12345678";
łączymy się i wchodzimy na adres 192.168.4.1 i tam wszystko się pokazuje
Protokół I2C
Aktywacja modułu wifi:
// WiFi credentials for the AP
const char* ssid = "SMARTBABY";
const char* password = "12345678";
łączymy się i wchodzimy na adres 192.168.4.1 i tam wszystko się pokazuje
Budowa
Jeśli ktoś jest zainteresowany budową takiego robota to może zajrzeć na materiały dostępne w internecie, projekt budowany i doskonalany przez kilka lat w Kole Naukowym Robotyków PW o nazwie omnidirectional, ze względu na charakterystykę kół które pozwalają na jazdę na boki. My zrobiliśmy tylko obudowę na kamerę, oraz bloczek który imituje spojler.


#include "HUSKYLENS.h"
#include <Wire.h>
#include <ESP8266WiFi.h>
#include <ESP8266WebServer.h>
#include <FS.h> // Include the SPIFFS library
HUSKYLENS huskylens;
// Motor control pins
const int motorIn1 = 12; // Motor input 1
const int motorIn2 = 14; // Motor input 2
const int motorENA = 13; // Motor enable (PWM)
const int motorIn3 = 3; // Motor input 1
const int motorIn4 = 1; // Motor input 2
const int motorENA2 = 2; // Motor enable (PWM)
// WiFi credentials for the AP
const char* ssid = "SMARTBABY";
const char* password = "12345678";
// Create an instance of the server
ESP8266WebServer server(80);
// Store the current and previous IDs
int currentID = -1;
int previousID = -1;
unsigned long motorStartTime = 0;
bool motorRunning = false;
void setup() {
Serial.begin(9600);
Wire.begin();
// Initialize motor control pins
pinMode(motorIn1, OUTPUT);
pinMode(motorIn2, OUTPUT);
pinMode(motorENA, OUTPUT);
pinMode(motorIn3, OUTPUT);
pinMode(motorIn4, OUTPUT);
pinMode(motorENA2, OUTPUT);
// Set up the ESP8266 as an access point
WiFi.softAP(ssid, password);
Serial.println("Access Point Started");
Serial.print("IP Address: ");
Serial.println(WiFi.softAPIP());
// Initialize SPIFFS
if (!SPIFFS.begin()) {
Serial.println("Failed to mount file system");
return;
}
// Start the server
server.on("/", handleRoot);
server.on("/id", handleID);
server.on("/prosto.png", handleProstoImage); // Serve the image for "prosto"
server.on("/stop.jpg", handleStopImage); // Serve the image for "stop"
server.on("/lewo.jpg", handleLewoImage); // Serve the image for "lewo"
server.begin();
Serial.println("HTTP server started");
while (!huskylens.begin(Wire)) {
Serial.println(F("Begin failed!"));
Serial.println(F("1. Please recheck the \"Protocol Type\" in HUSKYLENS (General Settings >> Protocol Type >> I2C)"));
Serial.println(F("2. Please recheck the connection."));
delay(1000);
}
}
void loop() {
server.handleClient(); // Handle incoming client requests
if (motorRunning && (millis() - motorStartTime >= 7000)) {
stopMotor();
motorRunning = false;
}
if (!huskylens.request()) {
Serial.println(F("Fail to request data from HUSKYLENS, recheck the connection!"));
} else if (!huskylens.isLearned()) {
Serial.println(F("Nothing learned, press learn button on HUSKYLENS to learn one!"));
} else if (!huskylens.available()) {
Serial.println(F("No block or arrow appears on the screen!"));
updateID(0); // Update the ID to 0 if nothing is detected
} else {
Serial.println(F("###########"));
while (huskylens.available()) {
HUSKYLENSResult result = huskylens.read();
printResult(result);
if (result.ID == 1 || result.ID == 3) {
motorStartTime = millis();
motorRunning = true;
}
controlMotor(result);
updateID(result.ID); // Update the ID over WiFi
}
}
}
void printResult(HUSKYLENSResult result) {
if (result.command == COMMAND_RETURN_BLOCK) {
Serial.println(String() + F("Block: xCenter=") + result.xCenter + F(", yCenter=") + result.yCenter + F(", width=") + result.width + F(", height=") + result.height + F(", ID=") + result.ID);
} else if (result.command == COMMAND_RETURN_ARROW) {
Serial.println(String() + F("Arrow: xOrigin=") + result.xOrigin + F(", yOrigin=") + result.yOrigin + F(", xTarget=") + result.xTarget + F(", yTarget=") + result.ID);
} else {
Serial.println(F("Object unknown!"));
}
}
void controlMotor(HUSKYLENSResult result) {
if (result.ID == 1) { // If detected object has ID 1
digitalWrite(motorIn1, HIGH);
digitalWrite(motorIn2, LOW);
digitalWrite(motorIn3, HIGH);
digitalWrite(motorIn4, LOW);
analogWrite(motorENA, 255); // Set PWM to maximum
analogWrite(motorENA2, 255); // Set PWM to maximum
} else if (result.ID == 2) { // If detected object has ID 2
stopMotor();
} else if (result.ID == 3) { // If detected object has ID 3
digitalWrite(motorIn1, LOW);
digitalWrite(motorIn2, HIGH);
digitalWrite(motorIn4, LOW);
digitalWrite(motorIn3, HIGH);
analogWrite(motorENA, 255); // Turn motor to the left
analogWrite(motorENA2, 255); // Turn motor to the left
} else {
stopMotor();
}
}
void stopMotor() {
digitalWrite(motorIn1, LOW);
digitalWrite(motorIn2, LOW);
analogWrite(motorENA, 0); // Stop the motor
digitalWrite(motorIn3, LOW);
digitalWrite(motorIn4, LOW);
analogWrite(motorENA2, 0); // Stop the motor
}
void updateID(int id) {
if (id != 0) { // If the detected ID is not 0, update the current and previous IDs
previousID = currentID;
currentID = id;
} else { // If the detected ID is 0, keep the current ID as the previous ID
currentID = previousID;
}
}
// Handle the root URL
void handleRoot() {
String html = "<html><head><style>";
html += "body { text-align: center; }";
html += "img { width: 400px; height: auto; }"; // Increase the size of the image
html += "</style></head><body><h1>Status: <span id='status'></span></h1>";
html += "<div id='image'></div>";
html += "<script>setInterval(function() { fetch('/id').then(response => response.text()).then(data => { if(data == '1') { document.getElementById('status').innerText = 'Lecimy prosto'; document.getElementById('image').innerHTML = '<img src=\"/prosto.png\" alt=\"Prosto\" />'; } else if(data == '2') { document.getElementById('status').innerText = 'Silnik zatrzymany'; document.getElementById('image').innerHTML = '<img src=\"/stop.jpg\" alt=\"Stop\" />'; } else if(data == '3') { document.getElementById('status').innerText = 'Skręcamy w lewo'; document.getElementById('image').innerHTML = '<img src=\"/lewo.jpg\" alt=\"Lewo\" />'; } else if(data == '0') { document.getElementById('status').innerText = 'Nie wykryto zadnego znaku :(('; document.getElementById('image').innerHTML = ''; } else { document.getElementById('status').innerText = ''; document.getElementById('image').innerHTML = ''; } }); }, 1000);</script></body></html>";
server.send(200, "text/html", html);
}
// Handle the /id URL
void handleID() {
server.send(200, "text/plain", String(currentID));
}
// Handle the /prosto.png URL
void handleProstoImage() {
File file = SPIFFS.open("/prosto.png", "r");
if (file) {
server.streamFile(file, "image/png");
file.close();
} else {
server.send(404, "text/plain", "File not found");
}
}
// Handle the /stop.jpg URL
void handleStopImage() {
File file = SPIFFS.open("/stop.jpg", "r");
if (file) {
server.streamFile(file, "image/jpeg");
file.close();
} else {
server.send(404, "text/plain", "File not found");
}
}
// Handle the /lewo.jpg URL
void handleLewoImage() {
   File file = SPIFFS.open("/lewo.jpg", "r");
   if (file) {
       server.streamFile(file, "image/jpeg");
       file.close();
   } else {
       server.send(404, "text/plain", "File not found");
   }
}